Overview: Dell DR4300e Backup Solution
Overview: Dell DR4300e Backup Solution
 Introduction
Dell DR4300e is a rack mounted 2U solution which is cheaper than its siblings DR4300 & DR6300. It is aimed for people who are looking for a budget device that can still offer good value for money. Feature wise it offers complete featureset of Dell DR series. Main thing which will interest people in this device is its capability to deduplicate and compress data with dell claiming dedup ratios in some cases to be 10:1 up to 15:1.
According to product documentation DR4300e Solution consists of preinstalled DR Series system software on a modified Dell PowerEdge R730xd appliance platform. As far as I could tell the OS is a highly modified CentOS.

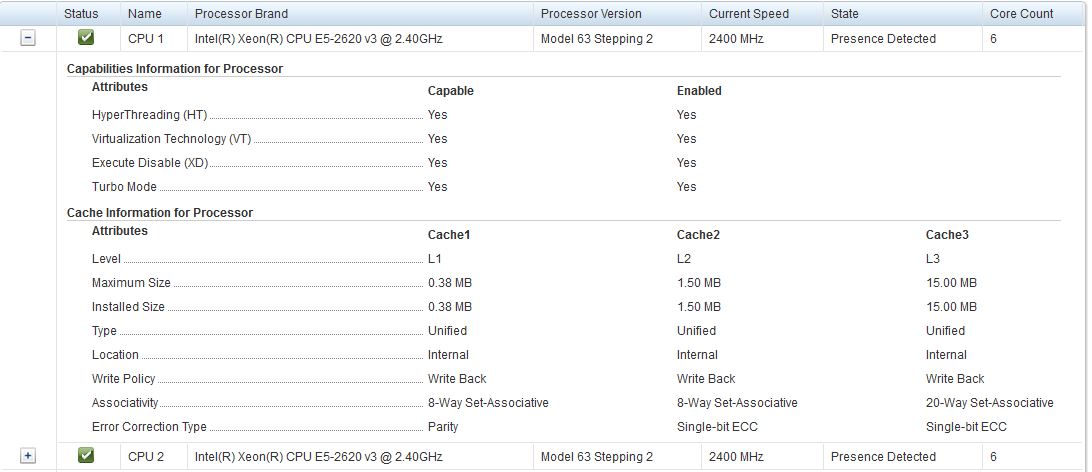
Processors:
Dell DR4300 system supports up to two Intel Xeon E5-2660 v3 processor.
My version shipped with E5-2620v3 @ 2.40 GHz
Storage:
Supports up to twelve 3.5-inch hard drives and two optional 2.5-inch back-accessible SAS, SATA, or Nearline SAS hard drives. Offers storage capacity of up to 27TB. My version shipped with 14 900GB SAS disks with PERC H730P Mini RAID controller. The disks were pre-configured with RAID6 (Dual Parity).

Memory:
Supports DDR4 registered DIMMs (RDIMMs). Supported memory bus frequencies are 1333MT/s, 1600 MT/s, 1866 MT/s, 2133MT/s, or 2400 MT/s. Minimum RAM is 4GB with single processor and 8GB with dual processor meaning 4GB sticks in two slots.Maximum RAM is 64GB with two processors. My version is equipped with two 16 GB sticks.

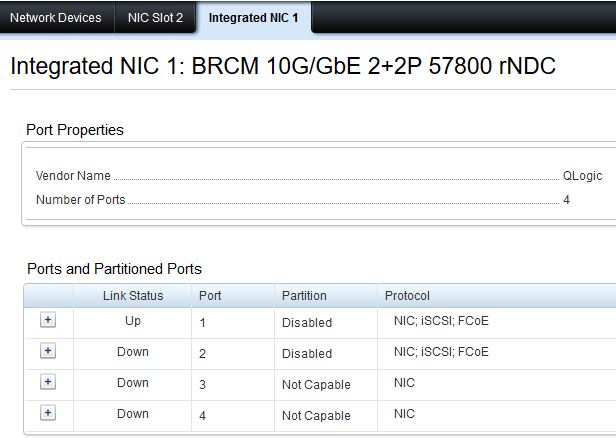
Network:
DR4300 has 4 NIC ports, which are available in one of the following configs
- Four 1 Gbps
- Two 1 Gbps and two 10 Gbps
- Four 10 Gbps
Internal Dual SD Module:
Also supports two optional flash memory card slots with an internal dual SD module.where the second card is for redundancy.
PSU:
Two 1100W hot-pluggable PSUs
DR Series System— The DR Series system backup and recovery appliances provide both efficient and high-performance disk-based data protection to leverage the advanced deduplication and compression capabilities in the DR Series system software. The DR Series systems provide a key component that performs backup, recovery, and
data protection operations.
Deduplication— This technology eliminates redundant copies of data and in the process it decreases disk capacity
requirements and reduces the bandwidth needed for data transfer. Deduplication can be a major asset for
companies that are dealing with increasing data volumes and require a means for optimizing their data protection.
Compression— This technology reduces the size of data that is stored, protected, and transmitted. Compression
helps companies improve their backup and recovery times while helping reduce infrastructure and network
resource constraints.
Initialization
The system has to be initialized on first use. I could not take pictures of the initialization procedure so reproducing only my notes.
- Connect a KVM to the DR4300e or use a separate Monitor, mouse and keyboard
- Start the system by pressing the power button
- A login prompt will be displayed type administrator, and press <Enter>
- Provide the default system password when prompted (St0r@ge!)
- An initialization screen will be displayed

- Type ‘yes’ so the wizard can proceed further
- At the next screen you will be asked to enter either a static IP, use DHCP or the default IP address which is 10.77.88.99
- I chose to provide a static IP and provided the details of IP,Subnet, Default GW, DNS
- You will also have the option to change the Hostname which is set to you Model#-Service Tag (DR4300e-IU9GX1), I left it unchanged and pressed <Enter>
- System will display the new settings for review and ask if you want to proceed or if you want to change anything. Press Y to continue or N if you made a mistake and need to change
- The system will display a message indicating a Successful Initialization message
- After this process you are good to go to configure the device using GUI
GUI
Enter the IP address you configured in previous step. If your network connectivity is setup up and working than a login screen will be displayed
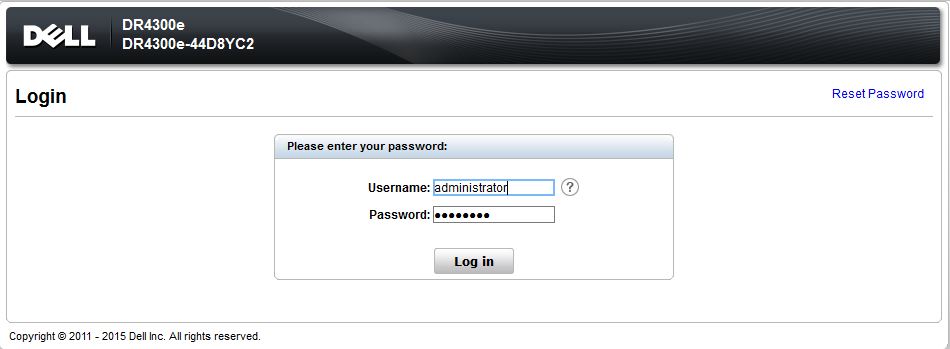
Login using administrator/default Passwd. A summary screen will be displayed:
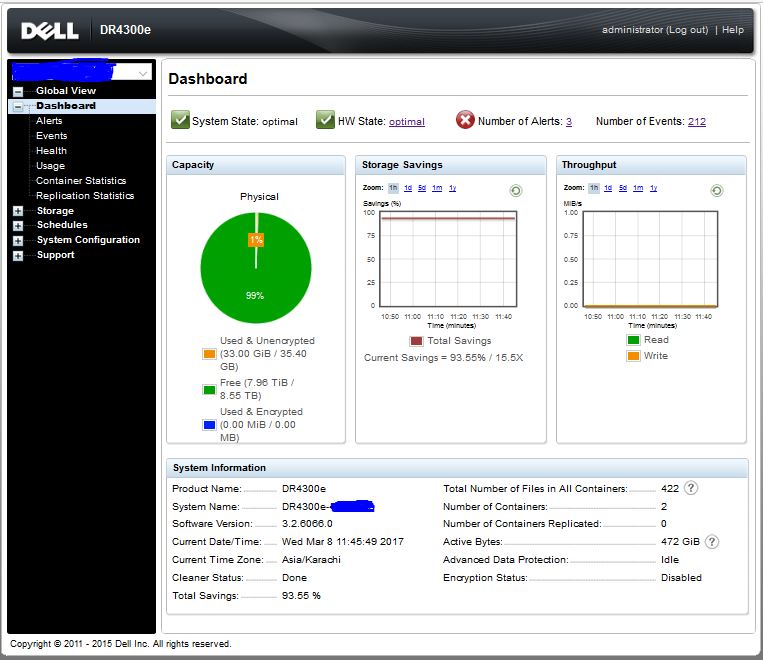
Congratulations on configuring your DR4300e. This is it for now. Next time we will see how to configure the DR4300e with Netvault.


Comments
Post a Comment